One of the exercises of the 3D course I'm doing in Domestika was to do a walk cycle, so I decided to design my own character and animate it! This is my character Baby Nessie and you can wacth it here, Searching For Water:
This is the walk cycle video of Baby Nessie, the music is Planet Discovery by Serge Quadrado.
I learnt so much working on this little project! Blender is such a powerful software! I love it
Although the exercise of the course was to do a walk cycle with a Santa Claus model provided by the teacher, I would feel more motivated animating my own character so I did a few sketches and come up with this little... lizard... froggy, dragony... creature, which I like to refer to like Baby Nessie:
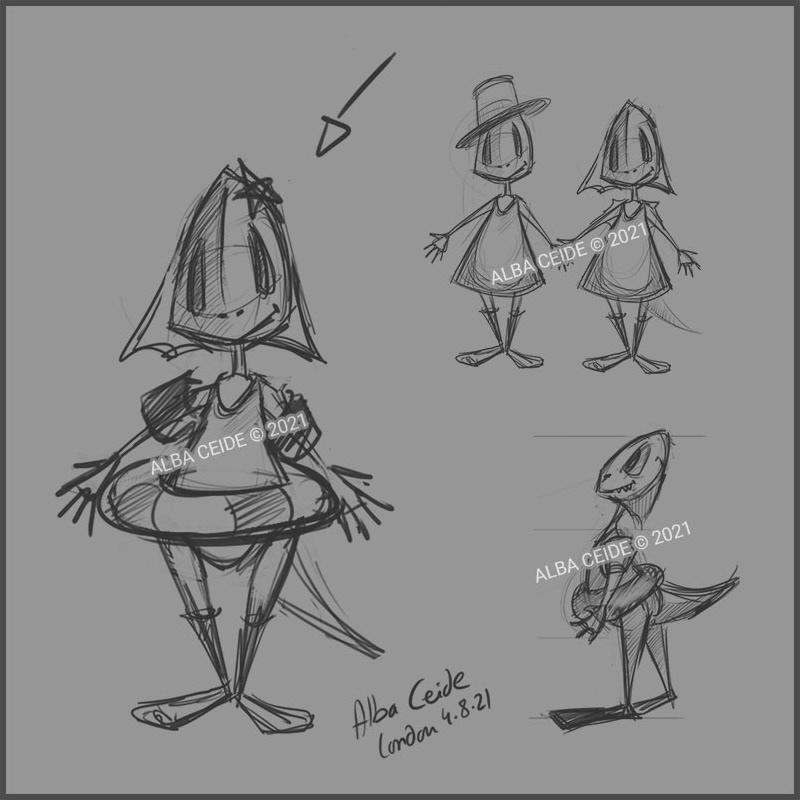
I thought it would be cute to design a little sea creature with swimming floats so I did :)
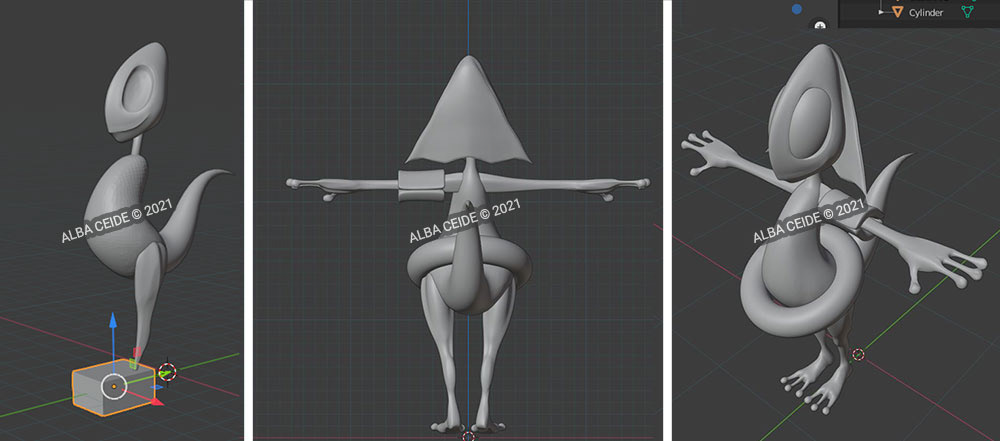
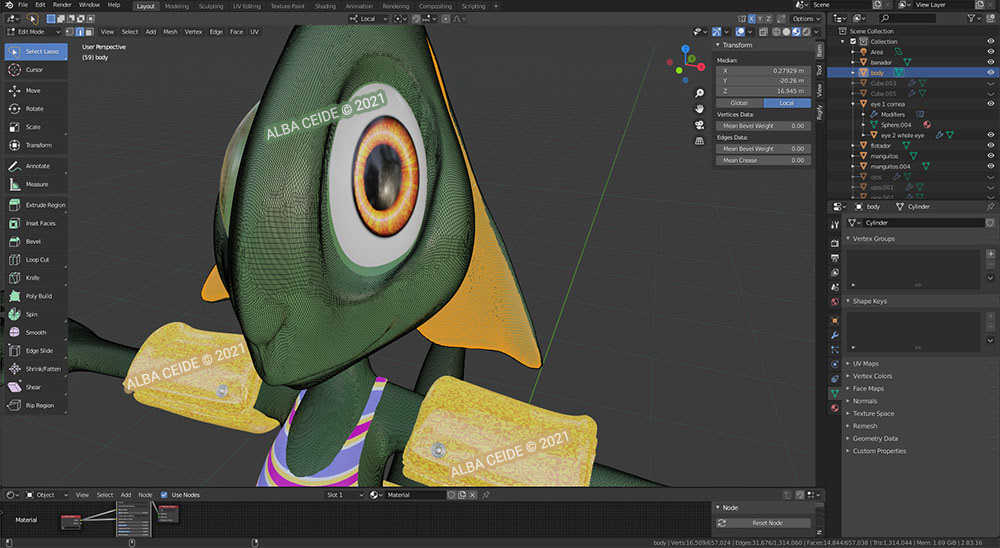
And this is how I started modeling Babie Nessie. The main shapes are Cubes with Subdivide Surface Modifiers that then I shaped in Sculpture Mode.
This time, I didn't want to colour the eyes with Vertex Paint, I wanted to create eyes that would look real and very expressive so I designed Procedural eyes with loads of nodes...
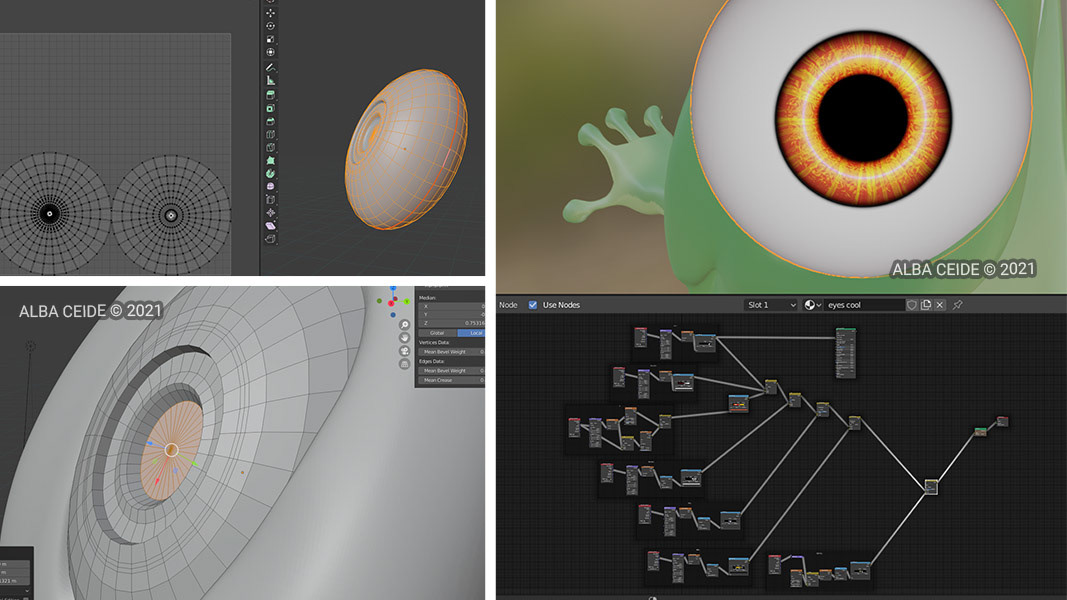
Creating the procedural eyes was complex but I learnt a lot about nodes, textures, gradients... so, I moved forward with the rest of my design!
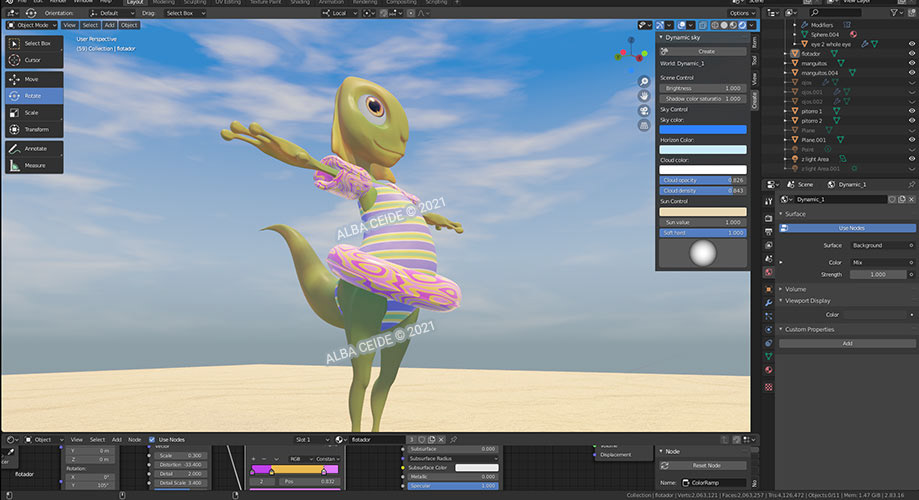
I liked the eyes so I carry one with my sculpture and used more nodes to design stylish patterns on the swimming floats of my little sea creature.
Colours have changed now... but at this point of the design I didn't know that I would be adding a background for the character.
I was very happy with the progress I was doing with my character so I thought... if I'm going to animate it doing a walk cycle... I must do as well a sandy floor and some sky! I wondered how could I turn the 3D world in a cloudy but summery sky and by doing a bit of research, I discovered the wonderful Dynamic Sky! So I've chosen the colour for my scene, the strengh of the sun, the clouds density... and voilà! Babby Nessie was suddenly in an actual environment!
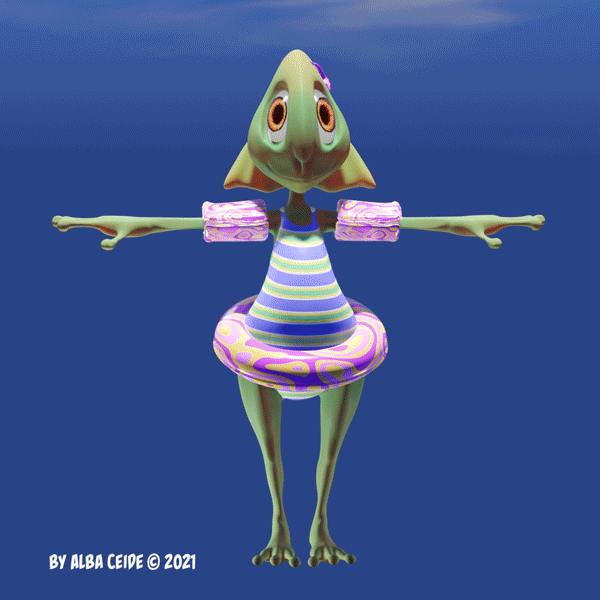
This is my final character design:
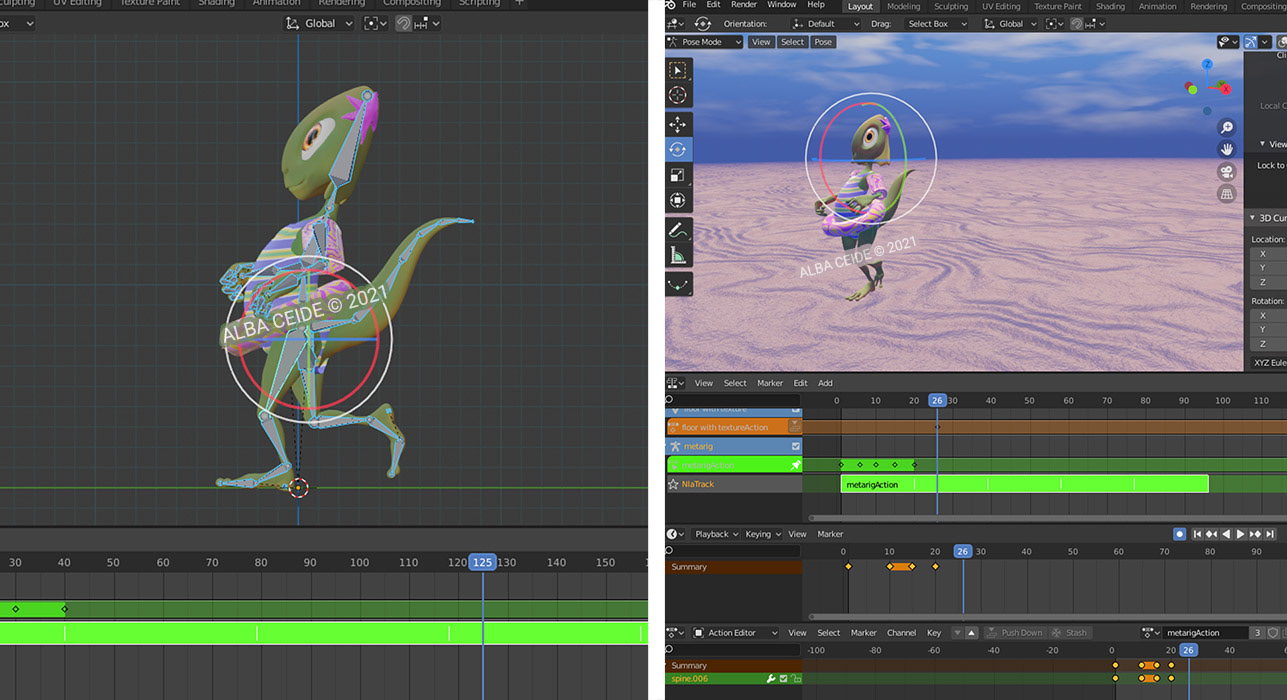
Once I finished the modeling of Baby Nessie, I added a skeleton to do the rigging. I adapted the Blender's default human basic armature to the body of my character and added extrabones for the hand/fingers and the tail.
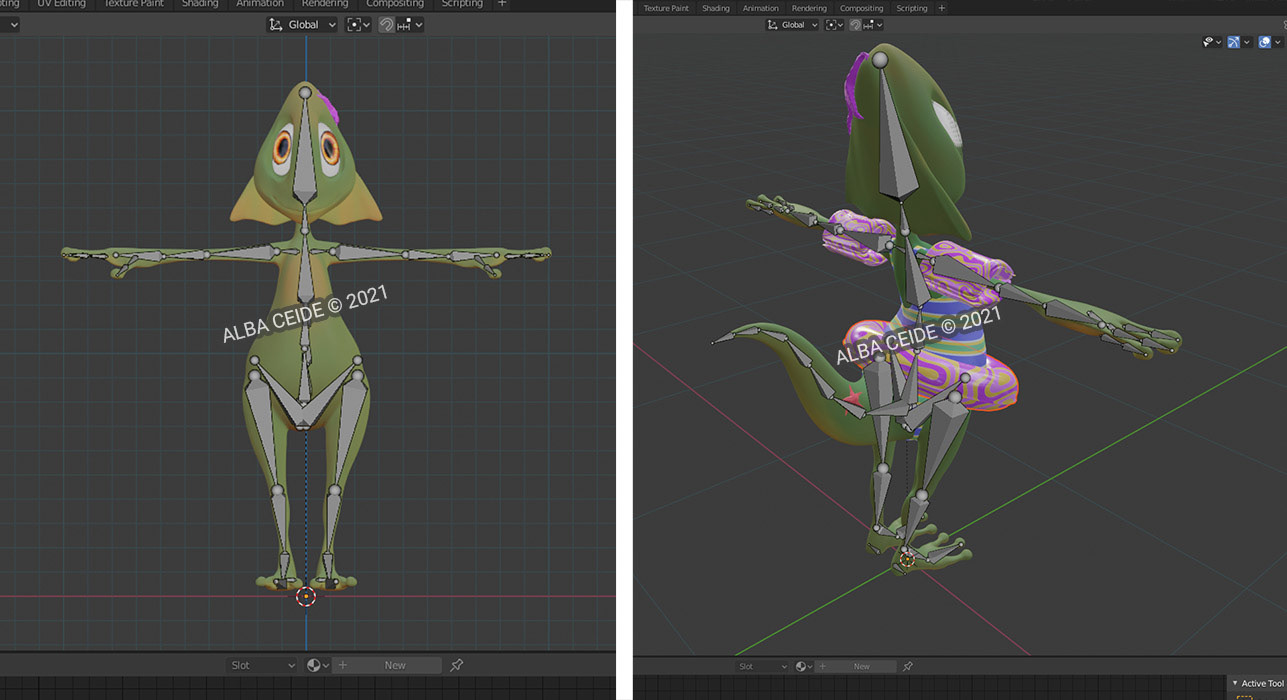
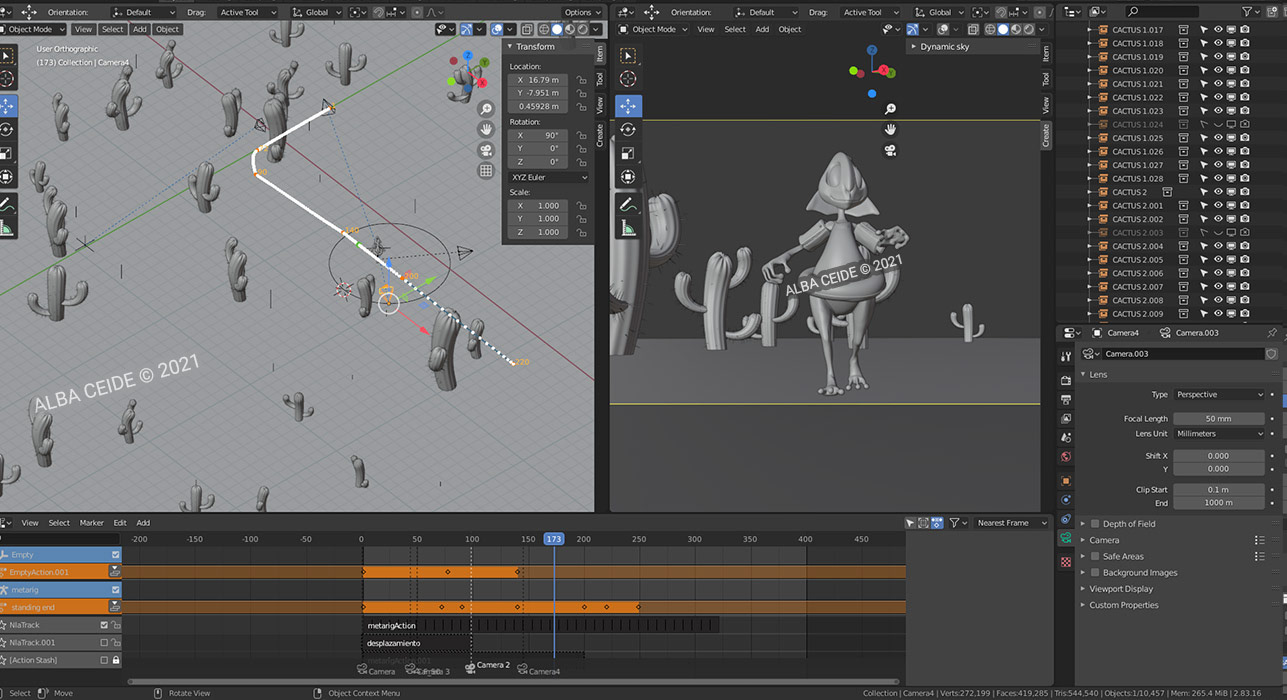
Rigging time has arrived! I positioned the character and once I had one walk cycle, I repeated the keyframes using the Non Linear Animation. It was looking good.
The sandy floor is also Procedural.
My job was done, the walk cycle was ready but... the scene was very empty so I created one cactus and use object instances to have... loads of them! Then I set up the camera (I really enjoy the camera placement) and my little new 3D project was ready!